 Every time you open a browser, send an email, or use an app, your data travels across networks that are not always secure. Hackers, data brokers, and even Internet Service Providers (ISPs) can potentially intercept or track this information. While firewalls and antivirus software help protect against certain risks, they don’t stop your internet traffic from being exposed.
This is where encryption comes in. By encrypting your internet traffic, you make your online activities unreadable to anyone trying to monitor them. A Virtual Private Network (VPN) like iTop VPN provides this protection by creating an encrypted tunnel between your device and a secure server. With features such as AES-256 encryption, a strict no-log policy, 3,200+ global servers in 100+ locations, and a kill switch, iTop VPN stands out as one of the most reliable tools for safeguarding privacy on Windows PCs.
In this guide, we’ll walk through the process of downloading, installing, and configuring iTop VPN step by step. Whether you’re a beginner who just wants simple protection or an advanced user seeking fine-tuned control, you’ll find practical instructions here.
Step 1: Download and Install iTop VPN
The first step in protecting your internet traffic is installing the right VPN client.


- Visit the official website
Head to the official iTop VPN Download Free for Windows PC page to avoid unofficial sources that could compromise security. - Choose the right version
iTop VPN supports Windows on ARM devices, Windows 11, 10, 8, and 7. Ensure you select the installer that matches your system architecture (32-bit or 64-bit). - Run the installer
Launch the setup file and follow the installation wizard. The process is quick, requiring minimal system resources. - Launch iTop VPN
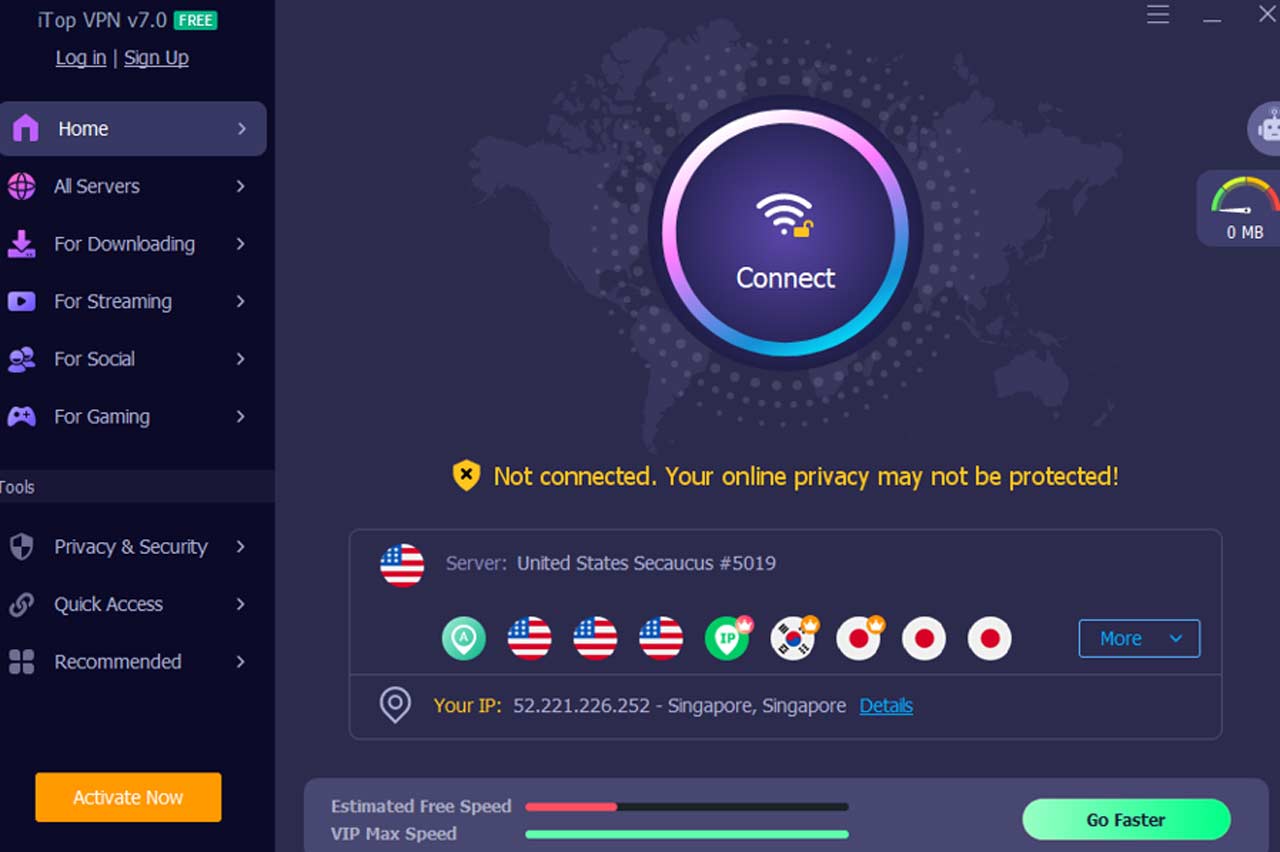
After installation, open the application. It will display a simple dashboard that guides you to connect right away.
Step 2: Initial Setup and First Connection
Once installed, iTop VPN is ready for use without complex configuration.
- Connect immediately
Click the “Connect” button in the center of the app. The software will automatically link you to the most stable and fastest server available. - Register or log in
While you can connect without logging in, registering for a free or premium account unlocks access to more servers, faster speeds, and advanced features. - Enable auto-launch

For continuous protection, select the “Launch iTop VPN on startup” option. This ensures iTop VPN automatically secures your traffic every time you boot your computer.
Step 3: Selecting the Right Server
Server selection plays a key role in both security and performance.
- Quick Connect
If you value speed, use the “Smart Location” feature. iTop VPN automatically chooses the best available server based on location and load. - Manual server selection
With over 3,200 servers in 100+ locations, you can manually select a server in your preferred country or region. This is especially useful for accessing region-specific services. - Dedicated IP
Premium users can opt for a Dedicated IP, which provides the same IP address each time. This is ideal for secure work logins or remote systems that require consistent authentication. - Double VPN
iTop VPN enables you to encrypt your traffic twice while your IP is changed by the first server, so even your ISP can’t track your destination server on the web.
Step 4: Configure Security Settings
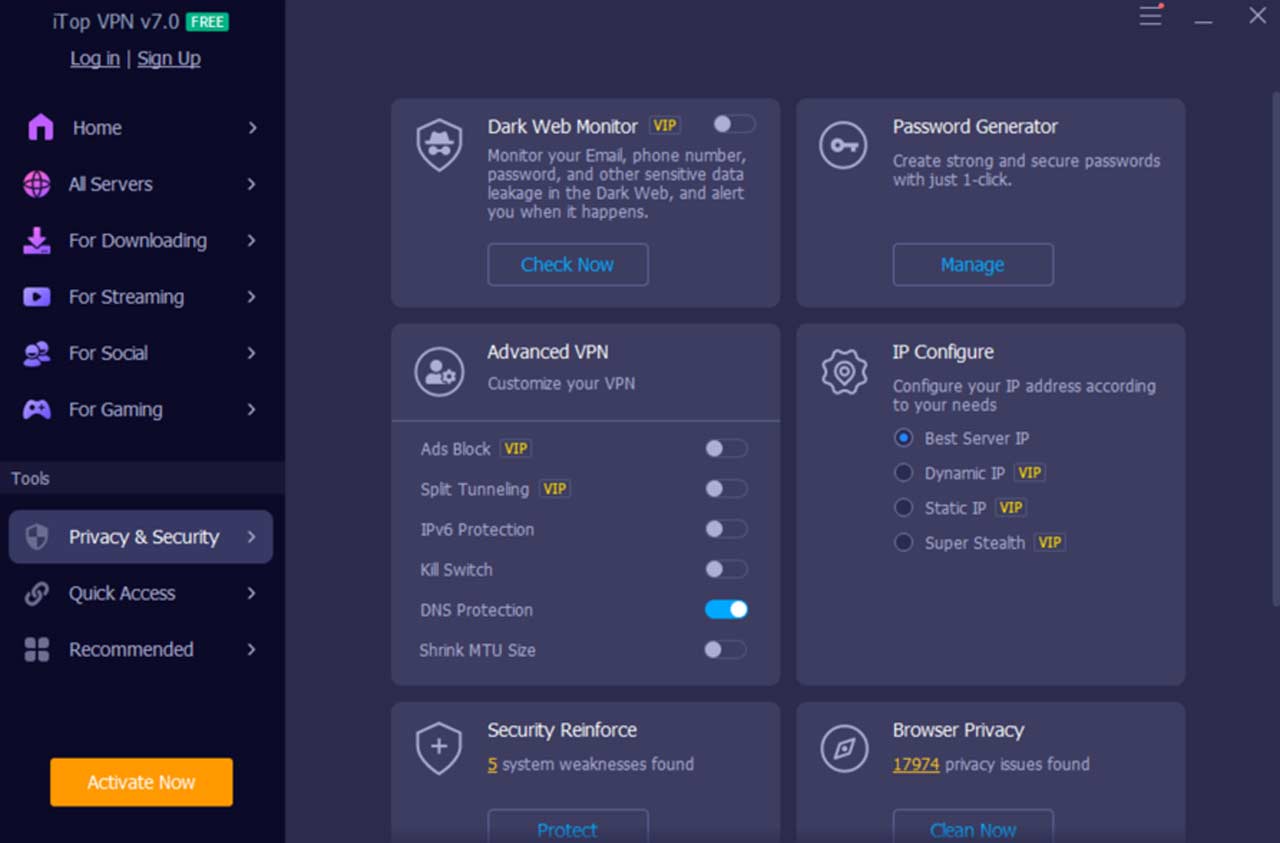
A VPN’s true strength lies in its encryption and supporting features. iTop VPN includes several customizable options:
- Encryption Protocols
iTop VPN relies on AES-256 encryption, the same standard trusted by banks and government institutions. You can also switch between TCP, UDP, or HTTPS modes depending on whether you prioritize stability or speed. - DNS Leak Protection
By default, your DNS requests could bypass the VPN tunnel, exposing your browsing history. Enabling DNS Leak Protection ensures every query passes through the encrypted channel. - IPv6 Protection
If your ISP uses IPv6, activate iTop’s IPv6 safeguard to prevent accidental exposure of your real IP. - Kill Switch
This essential feature blocks all internet traffic if the VPN connection unexpectedly drops, ensuring no unencrypted data slips through. - Split Tunneling
Want some apps (like local printers or banking apps) to bypass the VPN while others remain encrypted? iTop VPN’s split tunneling feature gives you that flexibility.
Step 5: Verify Your Encryption
After connecting, it’s important to confirm your VPN is functioning as intended.
- Check your IP address
Visit an IP lookup site. If configured correctly, you’ll see the IP of your chosen VPN server—not your real ISP-assigned address. - Test for DNS leaks
Use tools like dnsleaktest.com to confirm your queries are routed through the VPN. - WebRTC leak test
If you use browsers like Chrome or Firefox, run a WebRTC test to ensure your real IP is hidden. - Monitor connection stability
Keep an eye on connection speed and reliability. Switching servers can help if you experience slowdowns.
Step 6: Explore Advanced Features
Beyond encryption, iTop VPN includes valuable enhancements for an even safer browsing experience:
- Dedicated IP: Ensures consistency when logging into sensitive accounts.
- Browser Anti-Tracking: Blocks third-party trackers and clears browsing traces automatically.
- Security Reinforce: Scans your Windows system and suggests privacy improvements.
- IP Configuration: iTop VPN configures your IP address according to your needs: best server IP (fastest or closest servers), dynamic IP and static IP. You can always obtain the optimal IP address from iTop VPN IP configuration.
These features make iTop VPN more than just a basic encryption tool—it becomes a comprehensive privacy suite.
Step 7: Use Your VPN Strategically
Knowing how to use your VPN effectively ensures lasting protection:
- Always connect on public Wi-Fi
Cafés, airports, and hotels are hotspots for data interception. Keeping iTop VPN active prevents unauthorized access to your information. - Switch servers to optimize speed
Distance and server load affect performance. If a server feels slow, select one closer to your location or with lower usage. - Keep the app updated
Regular updates introduce new features, bug fixes, and security patches. - Combine with good digital hygiene
Use strong passwords, enable two-factor authentication, and keep your operating system updated for layered security.
Benefits of Using iTop VPN
- Strong security: AES-256 encryption, kill switch, and DNS/IPv6 leak protection.
- Wide global coverage: 3,200+ servers across 100+ locations.
- Performance options: Dedicated IP and split tunneling.
- User-friendly design: Simple dashboard for beginners, advanced settings for experts.
- Free and premium plans: Accessible for all users, with scalable features.
Conclusion:
Encrypting your internet traffic is no longer optional—it’s a necessity. Cyber threats, surveillance, and data exploitation are constant risks. With iTop VPN, you gain more than just encryption—you gain control, privacy, and peace of mind. By following the steps outlined here—download, installation, server selection, security configuration, verification, and advanced feature usage—you can confidently browse, work, and connect without fear of exposure.